Ombré Brows: Every PMU Artist’s MUST-HAVE Skill
PMU has come a long way in just a few short years! The results are looking more natural and realistic than ever - literally “blurring the lines” between the art of conventional makeup and permanent makeup. Clients want their PMU to look more natural than ever, almost undetectable, and we as evolving artists are all up for that challenge!
We’ve learned now that oversaturated or heavily outlined eyebrows can quickly become as outdated as big shoulder pads and teased hair, so it’s definitely not ideal to make them permanently etched like solid stickers on anyone’s face.
Enter the new era of every PMU artist’s must-have skill: the classic ombré brow. This effect and technique is so popular because it suits any skin type, mimicking the look of powdery eyebrow makeup with soft, delicate fronts and just the right amount of definition. Let's embrace a more subtle and timeless approach to enhance your client’s natural beauty!

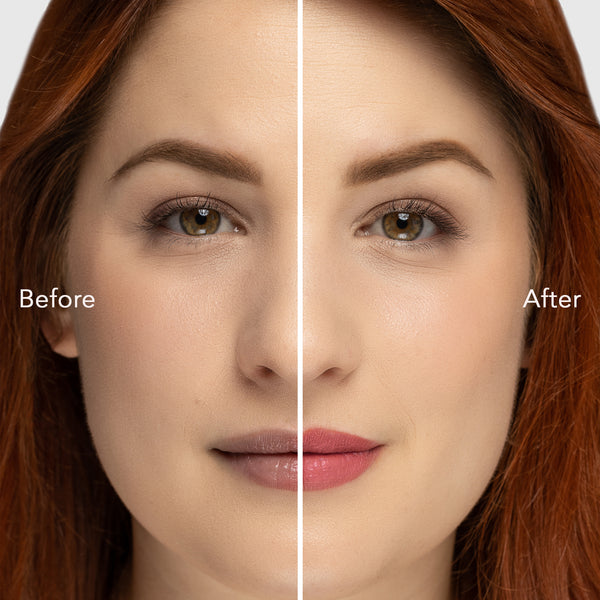
Before, after, and healed results using FADE Dark Neutral Brown & Dark Warm Brown by PRO Team artist @nataliadorward_pmu

Before, after, and healed results using FADE Dark Neutral Brown & Dark Warm Brown by PRO Team artist @nataliadorward_pmu
Now more than ever, clients want the convenience of waking up with “their brows but better,” so here are some must-haves to ensure you really nail your ombré brow skills:
1. Classic shaping
Do you find yourself asking “what’s the best shape for my client?” The answer is their own natural shape, of course! The goal of PMU should always be to enhance what the client already has by working with as much of their natural hair as possible for low-maintenance results. Utilizing their existing brows, paying attention to their bone structure with muscle movement, all while following cues from their facial features will allow you to craft a unique shape that brings overall harmony to the face.
Focus on creating fullness where the brows are too thin or lacking shape, and create a mini-lift by bringing up the tails, especially when the ends are wide or missing entirely.


Healed transformation using I ❤️ INK Blonde & Bolder Brown by PRO Team artist @sara.baseri.pmu
Avoid shaping mistakes, such as making the brows too angled/arched, too thick/thin, or too long/short. You also want to consider your basic brow rules, like making sure the head is the thickest part of the brow, with the arch thinner than the head, and tail even thinner than the arch for a feminine look or the arch thicker than heads for a masculine look. In any case, you also want to ensure that your arch is the highest part of the brow, and that the tail does not dip below the head of the brow, which can give a sad look. Tools such as string, calipers, and brow rulers can help to make sure you’re staying within these guidelines and aid you in following proper proportions.
2. Invisible borders
A dead giveaway of artificial brows are harsh, outlined borders. This can be caused by implanting the pigment too deep, too much hand pressure, too many passes, or using the wrong needle size.
Your initial outline needs to act ONLY as a guide to hold your shape and help you to color within the lines. It should never be a defined line that can be visibly seen. Be sure to only tickle the skin with the tip of the needle when you’re creating this outline. You want to overlap your sections by 50% to ensure an even deposit, wiping and checking your outline along the way to ensure you don’t “overdo it”. You may opt to reinforce your bottom edge, but you may still want to keep the top of the brow light and airy. Regardless of whether or not you choose to deepen the underside of the brow, the main key to a perfect ombré is ensuring that the head of the brow doesn’t have any defined outlines, but rather tapers off into a soft shadow.

Soft outline by PRO Team artist @antony_turner_pmu


3. Less is more

For that extra soft and airy look, avoid harsh angles such as dense edges and corners, especially at the front of the brow. You can even let the top of the brow remain borderless.


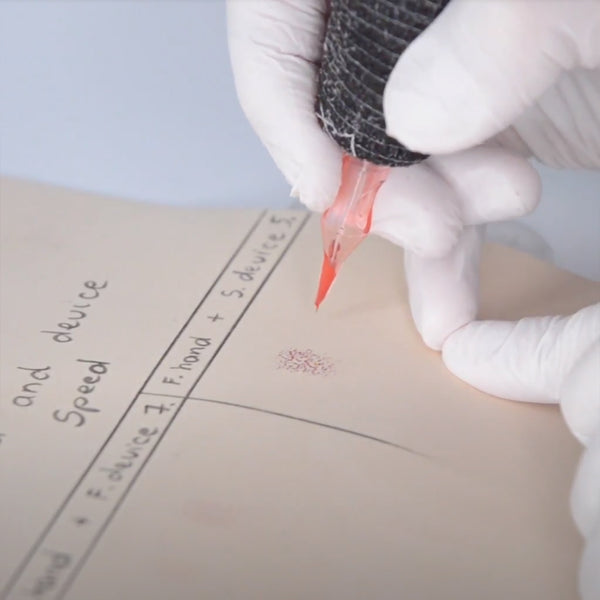
4. The ability to use various needles

with FADE Dark Neutral Brown by PRO Team artist @brows_by_jill
Consider that your different needle formations like 1RL, 3RL, 3RS, 5RS, and magnums are not just tools, they are the architects of pixels and the maestros of shading! These needles, with their distinct configurations, hold the potential to bring about an array of effects. After all, PMU is a creative journey and the size of the needle grouping plays a pivotal role. The larger the grouping, the broader the coverage; and vice versa, the smaller the grouping, the more intricate the detail. Imagine the skin as your canvas, and each needle as a brushstroke that forms pixels or creates soft, blended edges. The 1RL might be your fine-tipped pen, delicately crafting intricate details, while the magnum needle is your broad brush, sweeping across the skin with a graceful flow. Larger needle configurations also mean less time in the skin for less trauma and better retention.


We know artists are visual learners, and for the first time ever, we are bringing the industry’s top Master Artists to you! With our newest series on The Collective, Watch Me Work, you’ll be able to get up-close and personal with the best experts in the world as they walk you through how they execute their tried-and-true techniques.

For more tips on achieving your softest ombré brow yet, check out our premiere segment of Watch Me Work: Ombré Brows - Antony Turner. This demonstration is designed to enhance your skills in soft, shaded ombré techniques as you learn directly from PRO Team artist Antony Turner in the comfort of your own home. He shares insights, tools, and step-by-step demonstrations of each step of his signature brow procedure, from beginning to end with no gatekeeping!
Watch Me Work is a convenient, virtual alternative to in-person shadowing. Each video case presents unique challenges, showcasing before, after, and healed results, empowering you to tackle similar cases confidently. No theoretical lessons, just real client demonstrations by my favorite master artists in the industry.
Dive into Watch Me Work: Ombré Brows - Antony Turner