Article: PMU Aftercare 101: Healing Guide for Artists and Clients
PMU Aftercare 101: Healing Guide for Artists and Clients
Week 1:
The Key to Great Aftercare: Absorb, Wash, Moisturize
In your practice, you play a pivotal role in ensuring your clients’ new brows, lips, or eyeliner heal beautifully and last. Proper aftercare is the foundation for quick healing and long-lasting results, but it all begins with effective preparation—small details that make a big difference.
With nearly 20 years of experience and over 15,000 procedures, I’ve experimented with countless techniques to optimize client outcomes, testing dry and wet methods, washing and no-washing approaches, and a variety of products, creams, and ointments. My conclusion: the right pre-care and aftercare can transform results.
At Tina Davies Professional, we’re dedicated to equipping you with professional tools and insights to elevate your work, while supporting your clients in achieving optimal outcomes.
- This guide offers you actionable advice to streamline your aftercare process and deliver vibrant results, starting with a solid prep foundation:
- Do not pick/tweeze/wax/perform electrolysis one week before the procedure.
- Moisturize the area so it will be soft and supple before treatment. Note: chapped lips cannot be tattooed
- Do not tan two weeks prior to or have a sunburned face/skin.
- Do not have any type of facial 1 week prior to treatment.
- Do not workout the day of the procedure.
- Do not have Botox 3 weeks prior.
- Do not take Fish Oil or Vitamin E one week prior (natural blood thinners).
- Do not wax or tint your eyebrows 3 days before the procedure.
- For the eyes: remove lash extensions prior to the procedure.
- For the lips: take antiviral medication prior to the procedure to reduce the risk of cold sores.
- To avoid excessive bleeding and poor colour deposit:
- Do not drink alcohol 24 hours before your tattoo.
- Do not consume coffee or any caffeine before your procedure.
- Do not take aspirin or ibuprofen for pain relief (this thins the blood).
Think of it like prepping a canvas for a professional painter—sanding, filling holes, and applying the right primer ensures the best results. Share my secret recipe with your clients using the acronym AWM: Absorb, Wash, Moisturize, which will guide them through the aftercare process starting on procedure day.

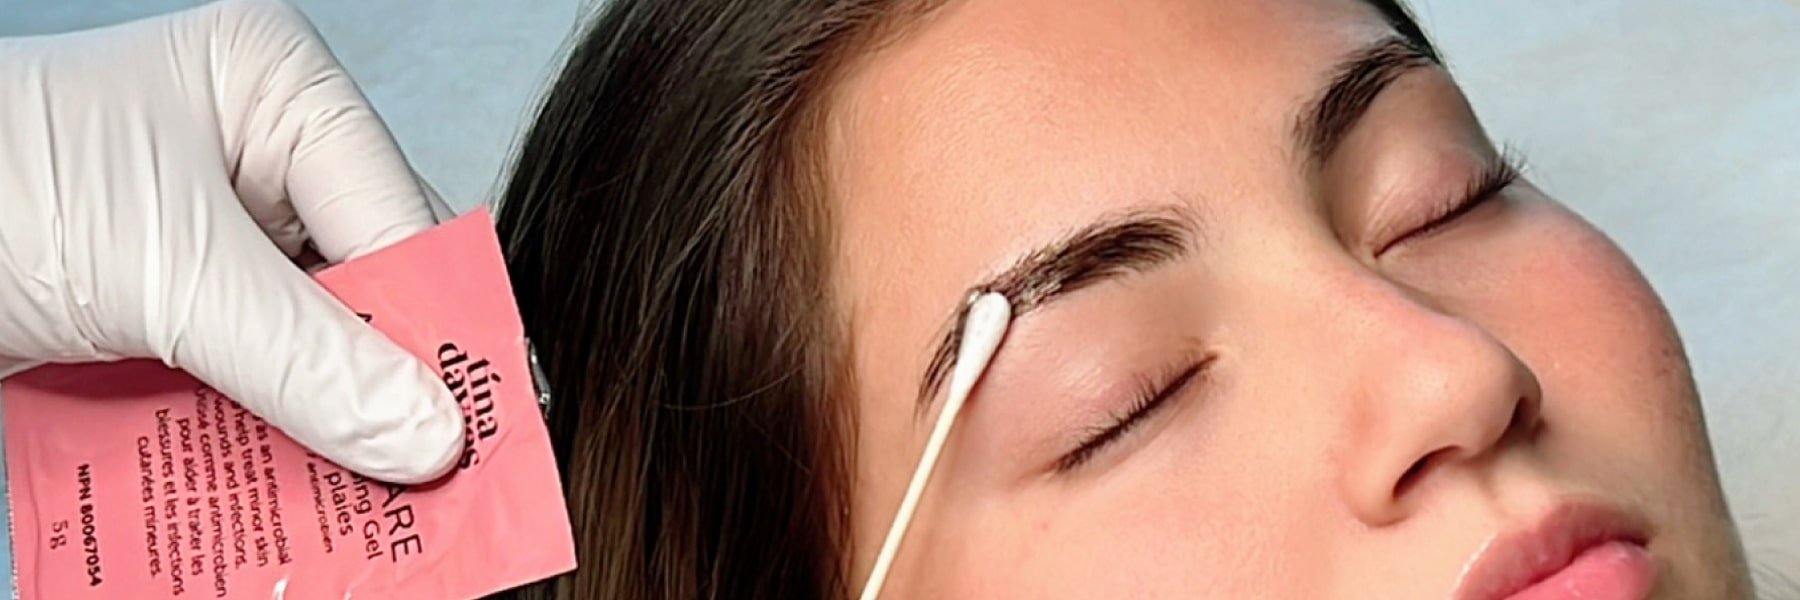
Tina Davies Aftercare Gel and Instruction Card
AWM Aftercare Routine
-
The Day of Treatment: Absorb
Direct clients to gently blot the area with a clean tissue to absorb excess lymph fluid every 5 minutes for the full day until oozing has stopped. Explain that removing this fluid prevents thickening of the lymph. -
Days 1–5: Wash
Advise clients to wash daily to remove bacteria and dead skin. (Reassure them this does not remove the pigment.) Instruct them to gently wash the procedure area each morning and night with water and an antibacterial soap like Dial, Cetaphil, or Neutrogena. Guide them to use a very light touch with fingertips, rubbing the area in a smooth motion, then rinse with water to ensure all soap is rinsed away. Recommend they gently pat dry with a clean tissue. Warn them to avoid cleansing products containing acids (glycolic, lactic, or AHA) or any exfoliants. -
Days 1–7: Moisturize
Instruct clients to apply a rice grain amount of Tina Davies Aftercare Gel with a cotton swab, spreading it across the treated area. Caution them not to over-apply, as this can suffocate the skin and delay healing—the gel should be barely noticeable. Advise them to never put the ointment on a wet or damp tattoo.
Important Reminders
- Use a fresh pillowcase.
- Let any scabbing or dry skin naturally exfoliate away. Warn that picking can cause scarring or loss of colour.
- No facials, Botox, chemical treatments, or microdermabrasion for 4 weeks.
- Avoid hot, sweaty exercise for one week.
- Avoid direct sun exposure or tanning for 4 weeks after the procedure. Recommend wearing a hat when outdoors.
- Avoid heavy sweating and long hot showers for the first 10 days.
- Avoid sleeping on your face for the first 10 days.
- Avoid swimming, lakes, and hot tubs for the first 10 days.
- Avoid topical makeup, including sunscreen on the area.
- Do not rub, pick, or scratch the treated area.
Important Note About Showering
Advise clients to limit showers to 5 minutes to avoid excessive steam as wet scabs take longer to dry out and heal. Instruct them to keep their face/procedure area out of the water while washing their body, then wash their hair at the end. Ensure their face or procedure area only gets wet at the very last moment, avoiding excessive rinsing and hot water on the treated area.
Week 2
IRL: The Complete Healing Process
This step-by-step guide is filled with insights from our teammate Laura, equips you to support your clients effectively. Laura documented her brow healing journey with a detailed account that aligns with the wet healing method. Share Laura’s full narrative below with your clients to provide a relatable roadmap.
Source: https://tinadavies.com/blogs/news/my-combo-brows-healing-day-by-day
By Tina Davies Professional Artist Success Manager, Laura.

Let’s be real here, most of our eyebrow journey’s have come a long way over the years. Thankfully, full brows have been in trend for a while now and I was able to grow mine back in from their former thin style. However, despite having full brows and a great shape, without adding brow pencils or pomade on a daily basis, they still left little to be desired. Sure, I could go with no makeup and have brows, but their shape was lost. The upper edges were not as full with finer hair, and the beginning parts of my brows had a mind of their own and grew in strange directions, causing them to look very sparse.
I love a good brow, especially a nice fluffy front, with clean arches and tail. So, I did what most girls do and would fill them daily - adding about 10-15 minutes to my routine at times just to get that perfect brow. Let’s face it, brows can make or break a face! Thanks to Tina, I now wake up with these brows.
It’s not all sunshine and rainbows, however; the healing process can be a scary time, and I hear it all the time from clients of artists. So I’m here to give you a real look into my healing journey and hopefully ease your fears if you, too are currently going through this process.
No matter what happens, remember, IT’S WORTH IT!
BEFORE

As I said before, despite having full brows with a great shape, the upper edges had finer hair that lost the shape. In addition, the front of my brows growing in different directions causing the fronts to look quite sparse in spots.
I had photos all ready to go with my “brow inspiration” Linda Hallberg.

When I started growing my brows back in, she was the image I used for my desired shape. I don’t want to stray too far from my natural shape, and so I found a happy place between my natural shape and the way she styled hers. This was also the basis for the design Tina created for me. We both settled on Dark Brown as my pigment choice as it closely matched both my brows and my hair, it was also well-suited for my skin colour.

I ❤️ INK Eyebrow Pigment Collection & Color Chart
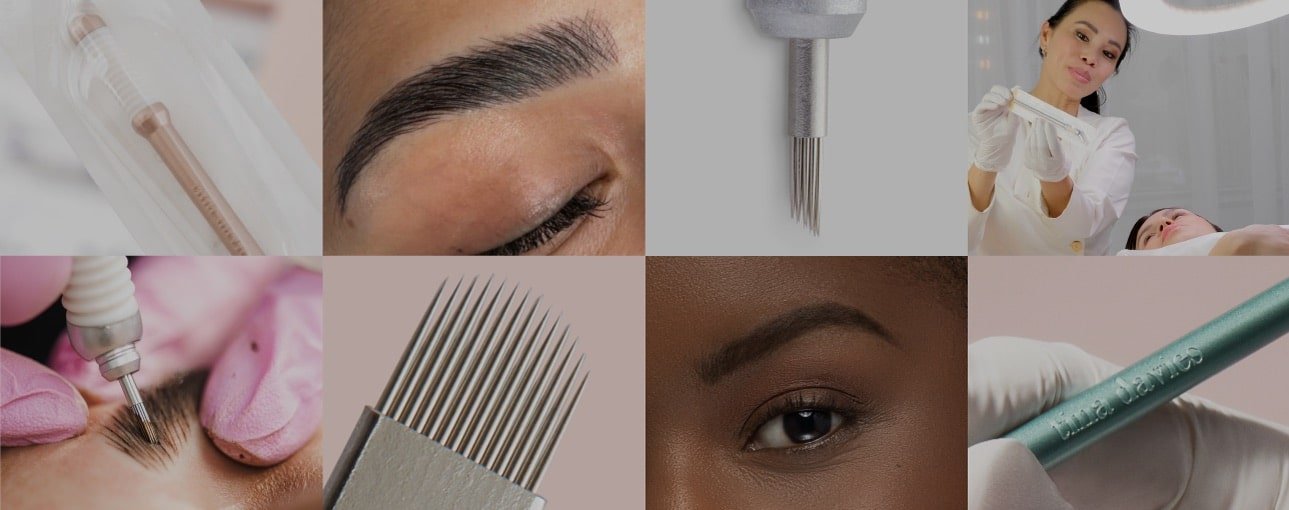
I let Tina know I wanted nice fluffy fronts with full strokes, but the arch and tail to be crisp with clean lines. To get this look, Tina used the Essential Nano Blades in both the 18U and 16 Curved. These gave her the ability to give more strokes in one area and helped achieve the fluffy fronts of my dreams. After filling in all the strokes, Tina went back in with a machine to shade from the tails up to the mid-part of my brow. This allowed a soft gradation into the fluffy fronts, but the clean arch and tails I desired.
Following my procedure, my brows were tender feeling. After about an hour of blotting the lymph fluid, there wasn’t much more to blot, I continued for the rest of the evening.
Within a few hours, I would say the most uncomfortable part began. The scabs were just starting to form and get stiff. Thankfully, that only lasted a short while and was gone by morning.
DAY 1 - IMMEDIATELY AFTER PROCEDURE Following the procedure, I was given an Aftercare goodie bag to take home with me. This included everything I needed to successfully take care of my brows and achieve the best-healed results.
In this bag I received:
- Tina’s Brochure with information on the Studio with information on Tina herself
- Tina’s Service Menu listing all the services she offers and their prices.
- A brochure including step-by-step Aftercare Instructions. This brochure breaks down the approximate healing schedule and the effects as healing progresses. It also included “Important Reminders and “Things to Avoid After Your Eyebrow Procedure”
- Several of Tina’s business card’s - why not share with a few friends!
- Two sachets of the Aftercare Healing Gel
- A container to put my Aftercare Healing Gel into.
- Gentle unscented soap to wash my brows with.
- Cotton Swabs in a sealed bag to apply my Aftercare Healing Gel with.

This Aftercare Bag allowed me to take the best care of my brows from start to finish through the healing process. I opted to use my own soap, but only because I had a very gentle fragrance-free and sulphate-free face wash I was already using that was suitable for use on my brows. Had I not had this, I would have used the included soap to wash my brows morning and night.
That first night, I washed my brows as recommended by Tina and followed by applying a rice-grain amount of Aftercare Healing Gel with the cotton swab once my brows were completely dry.
DAY 2

Waking up on Day 2 was the biggest shock. My brows appeared darker than I had remembered, and I felt like they overpowered my face. I knew to expect this, but I still had my first moment of “Oh no!” panic. I felt like Oscar the Grouch with these giant - but gorgeous - eyebrows! I put on a face of makeup, taking extra care not to get anything on my fresh brows. I felt much better afterwards as it took the focus away from my “Brooke Shields” thick brows - hers are GORGEOUS but not well suited to my face.
They didn't hurt or bother me at all that day. I often forgot I had them done until I caught my reflection and saw the fullest brows I’d ever seen on myself.
DAY 3 - 4

By day 3, my brows began to shrink and that panic I had felt on Day 2 subsided. I was feeling much more myself again. With the shrinking came the dryness and tightness, but that’s to be expected. I just made sure to apply my aftercare three times a day and gently wash my brows morning and night as I had been since the day of the procedure.
DAY 5 - 7


Day 5 my scabs began to lift in some spots, but not really flake too much until the evening. My brows still felt a bit dry, however, the tightness was gone. This was the first day of the itchiness. I had to just tap at them to relieve the itchiness with clean washed hands.
On Day 6 more of the scab had fallen off revealing the strokes beneath. These appeared almost lavender grey in colour as my skin was still healing. I knew to expect this so I did not panic.
By Day 7 or 8 the lavender went away and they just looked like a faint ashy brown. This was also the worst point of the healing as the scabs were getting quite thick and I had to fight every urge to touch and pick at them. Warning: do not pick, as this can lift the pigment with it and cause gaps in your healed results.
DAY 7 - 10
After Day 7 the majority of my scabs had fallen off. The worst of the healing will be either over or nearing the end. Do not fear if you are feeling pigment is missing or too light, this is all normal! This is the point where it is considered safe to fill your brows in if you’re needing a more defined look while the pigment is light.
Just remember, it WILL appear lighter than what you want but I promise your colour will come back soon!
DAY 14 - 21
At this point, the pigment in my brows began to darken again and settle into the desired colour. It was the perfect match for my brows and hair! I could wake up in the morning and my brows were absolutely perfect.
DAY 30


By day 30, my brows are completely settled, the pigment colour is a dream come true and I have not filled my brows in once since the day of my procedure. The amount of time I save in the morning makes getting ready a breeze.
By this point, I could see where a touchup is needed. For myself, the bottom front on my left eyebrow seemed to have peeled/lifted too soon and took the lower parts of the strokes with it. After 2 months, I can address this to Tina during my follow-up appointment and we can add those back in.
At the end of it all, I am SO thrilled with my brows and feel myself. To go out without makeup and have perfect brows is a game changer!
Tina recommends that a client does not come back for a follow-up microblading procedure until the skin is fully healed, and suggests 2 months after their initial procedure as the optimal time to come back for their follow-up!
I hope this look inside my healing journey can help you if you are going through some of the roller coaster scary moments of the healing process - or have a client that is. You are not alone, and this is completely normal! A few weeks of healing for years of perfect brows - I say it’s absolutely worth it!
📝 Procedure Notes:
🙍🏻 33 year-old Caucasian woman
🖋 Method: Microblading and Machine Shading
➡️ Needles: Essential 18U, Essential 16C and Tina Davies 3RL
🎨 Colour: I ❤️INK Dark Brown
🌸 Skin type: Fitzpatrick 2
Week 3
Tailored Care and Long-Term Maintenance

Frequent check-ins and tailoring aftercare advice keep you connected to your client during this anxious time and ensure they reach the best outcomes.
Here’s what they should expect for brows, eyes, and lips.


What to Avoid During PMU Healing
For your clients, avoiding these pitfalls ensures vibrant results. In your expertise, educate them to prevent complications:
- No Picking or Scratching: This can cause scarring or pigment loss, as Laura cautioned.
- Avoid Heavy Makeup/Skincare: Instruct clients to skip retinoids, acids, or exfoliants near the treated area for 14 days. Avoid pore-clogging petroleum, runny oils, or scented products that can irritate.
- Limit Sun and Tanning: Warn clients that UV exposure fades pigments and slows healing.
- No Sweating or Water: Advise clients to avoid pools, saunas, and intense workouts for 7–10 days.
- Sleep Carefully: Recommend clients use a clean pillowcase and sleep on their back to avoid rubbing the treated area.
- Neglecting Cleansing: Discourage the outdated “dry healing without washing” method, which can lead to bacterial buildup and yellow, crusty scabs.
Long-Term PMU Care for Lasting Results
- For Clients: Encourage your clients to protect their PMU with daily SPF to prevent fading, use gentle skincare, and schedule touch-ups every 12–18 months.
-
For You in Your Practice: Use follow-ups to educate clients on long-term care and suggest protective options to maintain vibrant results.
Week 4
FAQs for Artists and Clients
Q: Why does PMU look darker initially?
The color appears bolder due to surface pigment oxidation and scab formation, but softens in 1–2 weeks.
Q: When can clients resume skincare/makeup?
Wait 14 days before using active ingredients or makeup near the treated area. Include a clear timeline in your aftercare guide.
Q: How often should touch-ups be scheduled?
Plan a follow-up at 6–8 weeks, then annually or bi-annually, waiting 2 months for full healing. Leverage touch-ups to refine results and strengthen client relationships.
Q: What should I do if my PMU heals unevenly?
Some unevenness is normal during healing. Reassure clients that minor variations often resolve, and schedule a follow-up to fine-tune the color, address missing spots or further balance the shape.
Q: When should I seek professional advice during healing?
Contact your artist if you notice excessive redness, swelling, or signs of infection (e.g., pus or fever) beyond Day 3–5. Monitor client progress and offer prompt support to address complications early.
Q: Can I use makeup to cover uneven healing?
Avoid makeup on the treated area until 14 days post-procedure to prevent irritation or infection.
Q: How long until my PMU looks natural?
Pigment settles and looks natural within 4–6 weeks as the new skin cells rebuild though full results may take up to 2 months.
Elevate Your Client’s PMU Experience
You can enhance your services by introducing your clients to Tina Davies Aftercare gel, a product with nano-silver technology and hydration support with 10 pre-portioned packets aftercare card. This approach, backed by research into inhibiting bacteria like MRSA and promoting collagen production, helps maintain optimal healing conditions and supports consistent results across different skin types. While individual preferences vary, wet healing with proper cleansing remains the expert-recommended standard.

Leave a comment
This site is protected by hCaptcha and the hCaptcha Privacy Policy and Terms of Service apply.